Questions? Write Me at

Questions? Write me at fullcirclegardener @ cableone . net.

Composting 101: Maintanence


Let's take one last look at gardening's black gold, compost.  Several weeks ago, I told you that I would share with you the basics of starting a compost pile, and then I shared that the easiest way to compost is to get it from someone else. ;)  We examined choosing the right site & creating a structure or purchasing a compost bin so that you can start adding material to your own compost pile this week.

Remember the quote I gave you last week... "Backyard composting is the intentional and managed decomposition of organic materials for the production of compost."(Tumbling Composter manual).
Now that we know what we can put into our compost pile, let's get 'intentional' and 'manage' the organic material we have collected so that we can put our pile to work making black gold for us. I've seen compost making compared to following a recipe in the kitchen and I think it is a great analogy. In the kitchen we follow a recipe so that we know exactly what the results will be and how quickly we can get the results. The same is true for composting. The difference lies in whom we will be serving. From the kitchen we serve our family and friends, but in the compost pile we are serving our garden friends the soil microbes and critters. :)

The compost recipe is a relatively simple one as it requires only four or five ingredients; brown organic material, green organic material, water, air and optional soil as innoculant.  All of the four main ingredients are important in order for our recipe turn out the way we want it to. As in any recipe, too much or too little of any one ingredient may change the results of the recipe or how long it takes for the completion of the recipe. This being said, remember that the simplest compost pile is an uncontained pile of whatever brown or green organic material you have. If left completely unattended it will turn into compost in a year or so. Do not stress about getting everything perfect, it is important that composting not turn into a stressful job that you won't continue.  There are too many positive benefits of having a compost pile to give up on it all together!  Besides, I certainly do not have a perfect compost pile.  In fact, one year I raised more ants (sign that it is way too dry) than food for garden friends in my compost pile. :} 

Let us begin to put our recipe together...
Compost Recipe
75% brown organic material by volume
25% green organic material by volume
46-60% water content
air
optional - soil

Organic Material
Do you remember what made good brown and green organic material?  Gather those materials up.  You should have 75% brown organic material and 25% green organic material in your pile.  Too much green material can make a smelly pile so if you question always add more brown.  Layer those wonderful browns and greens like you are making lasagna.   Remember that you are trying to get a 3:1 ratio.  You could start by laying down 3 inches of leaves and dry lawn clippings with 1 inch of fresh lawn clipping and kitchen scraps on top.  Repeat your layers until your pile is about 3 feet high or your compost bin is full.

Water
A damp (not wet!) pile decomposes the quickest.  As you layer in your ingredients, lightly mist the dry materials.  Remember that your green organic material contains its own moisture so it does not need added water.  If you can grab a handful of material and squeeze water out of it, it is probably too wet and a pile is too wet it will begin to smell bad.  The remedy is to add dry brown organic material and stir it up.  If ants invade your pile, it has become too dry.  Stick the water hose down inside the pile to get the interior wet and spray down the outside.  You will need to water your pile every week or two if it is enclosed or you are having a dry spell. 

Air
Like all living organisms, the soil microbes and critters that are laboring in the compost pile need air to survive.  The pile will naturally settle and compress as the layers begin to break down.  This will begin to suffocate the workers.  Stir or fluff the pile with a garden fork or study stick every couple of weeks to maintain adequate air circulation.

Soil
To jump start your pile, add a sprinkling of garden soil every few layers.  Garden soil is full of guests that will become valuable workers in the pile. :)

So, my fellow gardeners, we have spent a few weeks investigating how to create some black gold for soil improvement and fertilization in our gardens.  I know I've learned a lot and I hope you have too.  I have found the book, "The Frugal Gardener: How to Have More Garden for Less Money" by C. T. Erler especially helpful during this series along with the websites that I have referenced in The Pile and Compostable Material.

If you have any questions feel free to leave a comment or send me an email.

Happy (Compost) Gardening! :)

All Posts in the Composting 101 Series:
-Introduction
-Check Local Waste Management
-The 'Pile'
-My 'Piles'
-Compostable Material
-Maintenance

Salsa Gardening

Tip Junkie


I am so excited to let you all know that I am writing a series of guest posts for the national blog Tip Junkie!  I've been bubbling with excitement for the last month and finally I can share with you! :D  Find "How to Grow a Salsa Garden" on Tip Junkie today.  This is first of four posts I will contribute to her Friday series on How to Garden.

WELCOME to visitor from Tip Junkie!  Feel free to dig around and ask lots of questions! :D  Also check out my Facebook page for more fun and interactions.

Happy Gardening (and Happy Memorial Day weekend to everyone!) :)

Spring Planting! Experimenting with Square Foot Gardening

My newly planted garden - May 19, 2011

Last week I shared with you that I have made a real effort to use the vertical space in my garden.  Doing this has given me the ability to plant and grow more in the space that I have.  This spring I also planted some things using the gardening method called 'square foot gardening'.  I'd never heard the words 'square foot gardening' until this spring when I attended a gardening day, but this method is also suppose to maximise utilization of garden space and I'm all for that!

Mel Bartholomew, the creator of the concept of square foot gardening, recommends planting in small raised beds so that you do not have to walk in your garden space.  This is a big benefit as you do not have to leave space for walking inside your garden and you do not have to worry about decreased production from compaction in the root zone.  While this is a great option for someone who does not have an established garden, I already have approximately a 14x20 ft raised bed and am not planning on changing it anytime soon.  I instead chose try my hand at square foot gardening along the front edge of my garden where I can reach in without having to walk in the garden.

reachable squares for easy access
My kids and I planted carrots, parsnips, spinach, lettuce, beans, kohlrabi and snap peas along this front edge (kids too can reach in and help without walking all over my plants... I'll tell you in a month or so if they strip all the produce out as well! ;}).  According to this system, your garden should be divided into one foot squares in which you plant specific numbers of seeds or plants based on the size of the mature plant.  Thankfully he also gives recommendations in his book** so I followed his guide.  Below is what I planted and the recommended densities for one square.  Note: Some of my seeds are several years old so I did plant 2 seeds in each location that I will have to thin out if both come up.

carrots     16
parsnips*     16
4 squares of snap peas
spinach     9
lettuce     4
bush purple beans     9
bush wax beans     9
kohlrabi*     9
snap peas     8

* not in his chart so I found something that was close at mature size and followed that suggested density

**'All New Square Foot Gardening; Grow more in less space' by Mel Bartholomew

Are you trying something new in your garden this year?  a new veggie?  a new variety of an old favorite?  a new method of gardening?  I'd love to hear about it!

If you are a square foot gardening 'pro', I'd love to hear your thoughts as well.  :)

Happy Gardening! :)

HSV Garden Challenge: Linkup #3


Note:  The next and final link up will be June 29.

Our core study material continues to be parts of the My Father's World kindergarten curriculum as I posted in the first HSV Garden Challenge link up.  Beyond that, this last month most of our garden studies have been more informal.  I have transitioned to making a conscious effort to include the kids in what I am doing in the garden and yard, and tie that with the current letter we are studying.


Zinnia planting
I posted in Linkup #2 that I was hoping to move our garden studies outside and last week we were able to do that.  The kids enjoyed the opportunity to get their hands in the dirt and plant their Zinnias as we studied Z (Zebra).  Timing was perfect because, how in the world does one incorporate gardening into Z studies except to plant your Zinnias!?!? :}  We measured the zinnias when we planted them and again this week.  We noted that there was no new growth since they were planted outside, but that it has also been cold and rainy; not the best conditions for adding new growth.  We will continue to observe their adjustment to being outside and how the weather plays a role in their growth and condition.

We studied R (Rock) last week too and talked a lot about soil and horse 'compost' (manure) as I was also preparing the garden for planting (which they also helped me do).  While we shoveled a load of 'compost' into the garden, my youngest grabbed an obvious horse dropping and said something to the effect of, 'this looks like poop!'.  I replied that the 'compost' was all horse poop and that it was going to give the plants food and help them grow good veggies for us to eat.  My oldest stopped digging, thought for a little bit, and responded, 'that's kind of icky!'.  We all had a good laugh and finished emptying the compost into the garden.  When asked later what we had done that day, my oldest responded like a well informed pro.  'Icky' or not, it was going to make the plants happy and so he was ok with it in the garden. :)

 We will examine life cycles for the next couple of weeks as we study B (Butterfly) and F (Frog).  We will be observing caterpillars transform into Painted Lady butterflies and I anticipate spending time talking about all the garden friends that help us by pollinating the flowers (butterflies) and eating the bad bugs (frogs).  I also look forward to spending lots of time reading "Zinnia's Flower Garden" by M Wellington, "Jack's Garden" by H Cole, and "Where Butterflies Grow" by J Ryder (kids received from Dolly Parton's Imagination Library) as well. (As I browsed some other of the HSV Garden Challenge participants I was reminded to read 'The Hungry Caterpillar' as well!)

We were asked to post about what I have learned through the Garden Challenge. As a new homeschooling mom, I've learned how easy it is to incorporate garden learning into your daily life when you are being intentional about it and I look forward to extending that to other areas of learning as well. :)  I am so excited to start harvesting from our garden in a few weeks.  We always have lots of raw eating before I ever get around to cooking anything, but I look forward to some eggplant parmigiana fresh from my garden later this summer! :)

Have you been outside gardening with your kidos?  I'd love to hear about it.

Happy Learning and Gardening!

Plant of the Week: Peas

Photo from the USA Dry Pea & Bean Council

Peas (Pisum sativum) are a part of the legume family which makes them a great source of nutritional protein for us and a great nitrogen source in our gardens.  Dry peas (split peas) have been cultivated since ancient times while tender peas (shell, snap and snow) weren't developed until the 1500's (CDC). The garden pea entered the realm of science in the 1800's when Gregor Mendel used the garden pea to study trait inheritance (stretch you memory back to school science classes!).

The shell and snap peas (eatable pods) are family favorites in my home and last week I invested a lot of room toward peas in my garden.  Peas are climbing plants and fit well in my recent focus on vertical gardening, but I also planted some in squares following the concept of square foot gardening.  They are a cool weather crop and can be direct seeded into the garden as early as 5 weeks prior to the average last spring frost.  Sow them about 1.5 inches deep and 3 inches apart in well drained soil.  Pick daily while they are in peek harvest season.  Once the temperatures get warm, the peas will start to fade and can be removed to provide space for something else.  I plant my garden knowing that I will be able to use the peas' space for squash, cucumber or pumpkin vines later in the season. 
2 shell pea rows
4 snap pea squares

Get more information on the garden pea from the National Gardening Association.

Feel free to share any plants that you would like to see featured as the plant of the week and I'll see what I can do.  See you back next Wednesday for the next Plant of the Week. 

Happy Gardening! :)

Composting 101: Compostable Material


Over the last several weeks we have been investigating gardening's black gold, compost.  In my introduction to composting I told you that I would cover some of the basics of starting a compost pile, and then I shared that the easiest way to compost is to get it from someone else. ;)  Last week we examined choosing the right site location & creating a structure or purchasing a composter so that you can start adding material to your own compost pile this week.

I was reading the compost guide that came with the Tumbling Composter that my husband helped his parents set up this last weekend.  I loved how simply they described composting in the following statement.  "Backyard composting is the intentional and managed decomposition of organic materials for the production of compost."  Before we can create 'intentional and managed decomposition' we need to find out what organic material we can add to our pile.

There are different two types of organic material needed in a compost pile.  These two groups of materials are commonly known as the 'greens' & the 'brown's.  Do not let the use of color names throw you off, they are only names.  The greens provide nitrogen, the building blocks, & the browns provide carbon, the energy,  needed by the soil microbes and critters to break down organic matter into compost.   Below you will find a list of the greens and browns you can put into your compost pile.  It is certainly not exhaustive but it does give the majors and some of the unexpected.


Greens (nitrogen):
lawn clippings
fruit/veggie kitchen scraps (peelings, rotten fruit/veggies in your crisper drawer!)
coffee grounds
tea bags
anything pulled from you garden/lawn that is not in seed, diseased or treated with herbicide!
fresh manure (NOT feces from carnivores or omnivores!)
(Note:  keep an ice cream bucket in you kitchen to collect the kitchen scraps; you can empty it all at one time at the end of the day.)

Browns (carbon):
dry leaves
straw
wood ashes
small amounts of untreated sawdust or wood chips
pine needles
shredded cardboard, egg cartons and newspaper (un-colored and non-glossy)*
natural fiber dryer lint
paper towels/tissues (uncolored)

*I've read mixed reviews on using paper because many paper products and inks may have undesirable chemicals.  I do add our shredded documents to my compost pile... no identity theft in there!

Other:
pet/human hair
feathers
ground seashells
egg shells


DO NOT Put In Your Pile:
meat scraps, animal fats or bones
anything with salt
pet feces (carnivores or omnivores)
anything diseased or with seeds
ANYTHING chemically treated (lawn clippings, weeds, wood, paper,...)
plastic, metal or other non-organic material
glossy or colored paper (ex: magazines)
anything black walnut or red cedar (contains a natural growth inhibitor!)
large amounts of sawdust or wood chips

Did you find anything that surprised you?  Those of you who are already composting, are there any things you like to add to your pile that I didn't include?  Next week we'll examine the details of maintaining a compost pile so that we can create compost as quickly and efficiently as we can.  Be sure to post or email me any questions you have so that I can answer them before our series on composting comes to an end.

Even I have questions occasionally (;P) and I referenced the two sites listed below in preparing this post.
NDSU Extension: Compost
National Gardening Association: Making Compost

Happy (Compost) Gardening! :)

All Posts in the Composting 101 Series:
-Introduction
-Check Local Waste Management
-The 'Pile'
-My 'Piles'
-Compostable Material
-Maintenance

Dandelions Everywhere and I'm Experimenting...

Common Dandelion ( Taraxacum officinale)

I have an update on my dandelion problem.  We partially gave in to chemical & treated the front lawn with a 'weed & feed' this week, but I am experimenting with a couple of 'organic' weed treatments in the backyard where the kids spend most of their outside play time.

The scientist in me has created an experiment.  I read somewhere that boiling water kills plants & that makes sense to me... so I'm trying a couple of things.  I've created 5 plots in my backyard with 4 treatments and 1 control.


1) pour very hot, but not yet boiling water onto the plants
- My hypothesis:  the top will be killed right away, but the root will come back.
hot water plot


2)boiling water straight out of the pot onto the plants.
-My hypothesis: again, that this will just kill the top, but not enough of the root.
boiling water plot


3)only pull the weeds with my weed puller
-My hypothesis: I won't get enough root to kill most of the plants
pull only plot


4)use my weed puller & pull out as much of the dandelion as I can and then will pour some boiling water down the hole.
-My hypothesis:that this will kill the root & hopefully not as much of the surrounding grass.
pull and boiling water


5) control - no treatment (though I will remove flowers so that I'm not increasing my problem!
control (but removing flowers)


I'll keep you update with results...


Happy Dandelion Control & Gardening!!!  :}


Other posts in this series can be found here:

Dandelions Everywhere!

Dandelions Everywhere and I'm Experimenting...

Dandelions Everywhere: Experiment's Tentative Results

Dandelions Everywhere: The Experiment One Year Later

Spring Planting! Go vertical!!!

Planted May 19, 2011

Oh the joy of digging your fingers into deep, dark, rich soil and dropping a seed or two into the hole knowing that in a few short weeks will be producing juicy tidbits for your table!  Today I had that distinct please as I planted my garden.

I also had the distinct pleasure of knowing that I had started all but two of the plants I put into my garden.  In January, I began the 2011 journey of gardening by inventorying my seeds and deciding what I wanted to plant.  Then in February I began starting seedlings in anticipation of this day.  I am not completely happy with how my seedlings did this year.  The tomatoes are small yet and the peppers just past the first leaf stage this week. :(  I did plant the tomatoes, but the pepper are still in the greenhouse.  I have been letting the temps get up to 98F in there during the hot part of the day and they have started to really take off.  I'm hoping that it will stay warmer in there over this upcoming rainy spell & they will be encouraged to a size big enough to plant and get produce from before fall frost!  (If not, I'll be knocking on your door for a couple since you started yours with me right?!? ;P)

You will notice lots of structures in my garden.  A couple of years ago I realized that I was missing out on using a huge chunk of space in my garden by not using the vertical space.  Last year I took the leap and made myself some structures to start using that vertical space more efficiently.
Mini-Pumpkin Trellis

Today, I planted mini boo & jack-be-little by the 6ft tall A-frame.  Last year they shot right up the side and I thought they'd go for the stars!  Instead, after reaching up a couple of feet beyond the top, they started down the other side.  (These little pumpkins were so much fun in the fall for the kids to paint and I was still able to cook them for pies!)
Cucumber Trellis
 I used an old crib railing I was given to trellis my bush cucumbers.  Last year, the crib railing was the perfect height for the plants and the cucumbers hung down through the railings so they were really easy to find.  I was so happy with both of these vertical structures and would wholeheartedly recommend something like them to anyone wanting to move into the vertical spaces of their garden!
  
Notice the ice cream buckets with netting over them under the trellises?  This is something new I'm trying this year.  I have been plagued with squash borers the last couple of years.  They are the larvae of a moth that lays it's eggs at the soil line on vining plants early in the spring.  After they hatch, the larvae borrow into the stem and eat it from the inside out.  For two years in a row now, they have killed my bush buttercup squash and left their mark on the rest of my vines.  I'm ready to put a stop to them!  My Dad read about using a tunnel he called a cloche and netting to stop moths from getting to plants, so last fall he and my husband made a couple of tunnels so I could try this out.  I really hope it works... I'll let you know in a couple of months.
squash cloche covered with bird netting
I am also planning on using the tunnel as a trellis after the plants are well established.  I'll stake it up on it's short side and let the buttercup squash climb it.  I was just reading this week on a National Gardening Association facebook post that you can support heavy produce with a sling made of panty hose or t-shirt, so I thought I'd give a more weighty crop the trellis treatment this year.  I also planted some jack-o-lantern pumpkin seeds that I got from the Seeds of Change organic seed deal that was available in March.  I plan on making a trellis for that to go vertical as well!  Are you seeing that you can put so many more plants in your garden when you use your vertical space?!?!

A cloche is technically a bell-shaped greenhouse placed over a plant to protect it from the elements according to an article on the National Gardening Association's website.  I employed this concept using milk, juice and soda bottles to cover my small tomatoes today.  I'm hoping that this will keep them a little warmer and encourage them to grow quicker.  I just removed the lids for ventilation, cut the bottoms off and slid them down over my poor little tomatoes.

My tomato cages are new this year.  They are another brain-child of my Dad.  I have complained since I began my own garden that I couldn't find a study tomato cage; one that wouldn't collapse under the weight of plants heavy with tomatoes.  Mom and Dad had made the above mentioned tunnel cloche and this tomato cage as part of their arsenal to keep deer and turkey out of their garden.  Mom was happy with her cages and said that she had at least one plant come out the top of the cage!  I placed the cages in clusters of 3 hoping they will support each other, but I remain a little nervous about the stability of the cages.  I guess time will tell!  The cages have a 2ft diameter and so I took a chance & planted 2 plants in each one.  I suspect that I will have a tangled jungle on my hands this fall!  Again, time will tell.

I told you that I was able to attend a gardening day a couple of months ago and was excited to implement some of what I learned in my garden this year.  I was encourage to continue my utilization of the vertical space, but I also was introduced to the concept of square foot gardening.  I implemented that concept with a number of my smaller crops and will share more about that soon in another post.

I hope you were able to play in the dirt today, especially if you're expecting rain like we are tomorrow!  I certainly enjoyed my day. :D

Happy OUTDOOR Gardening! :D

Preparing the Garden Site: Amending for deficiets


Several weeks ago I collected soil for a soil test.  Unfortunately, I just got it dried out this week so it will not be done in time for this year's planting.  We are expecting rain for the next week starting tonight or tomorrow and so I spent yesterday preparing my soil for planting.

Now is the time to add any amendments to your soil that you need... fertilizer, organic matter, lime, acid, etc.  For example, even without a soil test I can tell you that my soil has a very high clay content. To compensate for this, every year I incorporate as much compost and organic matter as I can.  The organic matter helps to soften the soil and holds plant accessible water.  This year my compost hasn't broke down as much as I would like and so I decided to contact my cousin who has a horse stable to see what he had for composted manure.  He was more than happy to fill my trailer for me from a pile he thought was about 5 years old! :)
horse 'compost'

unloading 'compost'


topped by 2 inches 'compost'
By 6pm last night I had shoveled the first trailer load into the garden and decided that I could take more so back out to the stables we went for one more load.  My wonderful husband tilled in the first load right away but it was too late to till the second load in last night so he took a long lunch break and tilled in the second load today. :)  (I tell you, I love my man!!! He is the greatest!!!  :D)

tilling in the 'compost'
 Now my garden is ready for planting & I'm off to put some seeds in the ground before tomorrow's rain!!

Happy Gardening! :D

Free Compost & Wood Chips in Fargo

Fargo residents, don't forget you can pick up FREE compost and wood chips at the landfill compost site today and tomorrow!

Check out my thoughts on getting compost from someone else here.

Happy Gardening! :)

Plant of the Week: Tulips


Tulip (Tulipa sp.)

I chose tulips to be my first post in this series because they are beautiful bright spots of color in my otherwise bland landscape this time of year and I love spring color! :)

Tulips come from the genus Tulipa and are native to the eastern Mediterranean area.  They were introduced to Europe in the 1500's and became so popular that they were traded as currency in the first half of the 1600's.  I was introduced to this as the 'Tulip Craze', but I've read it referred to as 'Tulipmania'.  This craze is frequently used to illustrate over-inflation of value of a product in financial circles.  (Don't you love that plants so often make great illustrations in other parts of life!)  Today tulips remain one of the most commercially traded flowers in the market for both landscaping and cut flowers.


Tulips are a favorite because they are one of the first signs of spring each year and because they can be found in so many colors!  (I'm thinking about adding some more colors around my home!)  Tulips like well drained soils, long cool spring and cold winters, but they can be and often are planted as annuals in warmer locations where they do not get cold enough to reset the flowering cycle.  

Tulips should be planted in the fall.  Place them in the soil about two times as deep as the diameter of the bulb... meaning if it has a two inch bulb you would plant it so there is 4 inches of soil on top of it.  They are relatively disease resistant but are susceptible to rot if they sit in wet soil, so be careful to plant them where they will not sit in water.  After flowering, it is ok to dead-head the tulip, but do not remove the leaves unless you already plan on replacing them in a season or two.  The leaves are needed to store energy for flowering the next year.  If you need to relocate a tulip wait until the leaves start turning yellow and then dig it up.

I researched the following sites for my information.  If you would like more detailed information check out some of these links:
Wikipedia
NDSU Extension
National Gardening Association: Tulips
National Gardening Association: Planting Tulips

Other sites I found helpful, but are not educational or reference sites are:
http://www.theflowerexpert.com/content/aboutflowers/exoticflowers/tulips
http://gardeningtips.org/Tulip.shtml

I hope you enjoyed learning a few facts about tulips.  Feel free to share any plants that you would like to see featured as the plant of the week and I'll see what I can do.  See you back next week for the next Plant of the Week.  Happy Gardening! :)

Composting 101: My "Piles"


Yesterday I introduced the concept of the compost 'pile' to you and shared that I use a composter that I purchase for my compost.  Sometime my composter is not big enough and last night was the perfect demonstration of that.  My husband mowed the lawn & there was no room for the lawn clippings in the bin so we started our backup pile.  I use the space between the composter, the garden, the shed and the fence to create a free-form, 'uncontained' compost pile. 

My composter & my 'pile'.
I do not invest any extra time & energy into this pile; it is just my overflow stock pile, but I could maintain it and get beautiful compost from it as well as my composter.  I use my stockpile as mulch in my garden or for 'green' material in my composter as the summer goes on and most often it does not last too long.  Sometimes it does get large and last awhile in the fall when I mow tree leaves and grass in our yard.

I'm sure you are curious about the term 'green material' I mentioned above... stay tuned!  Next week I'll share more about the 'green' and other organic material that you should add to your compost.

Happy Composting & Gardening! :)

All Posts in the Composting 101 Series:
-Introduction
-Check Local Waste Management
-The 'Pile'
-My 'Piles'
-Compostable Material
-Maintenance

Composting 101: The "Pile"


In my introduction to composting I told you that I would cover some of the basics of starting a compost pile, then I shared that the easiest way to compost is to get it from someone else.  If you are not able to find compost that you trust from someone else, then it is time to start your own.  The first step in creating a compost pile is selecting a site and the second is deciding how simple you want the pile to be...

Even something as simple as composting kitchen scraps and/or lawn clippings takes some effort and input by you; therefore it is in your best interest to make it as simple and easy as possible to integrate into your everyday life!  This means you will want to consider carefully where you establish your compost pile.  Fortunately a compost pile is basically odorless if properly maintained, but it is not considered to be a beautiful sight by most individuals, so you will want it to be not too obvious in your yard-scape.  That being said, the more easily accessible it is for both putting material in and maintaining it, the more likely you are to use it!   Also, a compost pile exposed to sunlight heats up and matures faster if you are looking for a quicker turn around.

In its simplest form, a compost pile is just that, a loose and uncontained pile.  If you expect to have much input into your pile or wild critters (raccoons, skunk, deer, turkey,... I've heard of these & others) you may want to consider containing your pile in some manner.  Whatever type of containment you choose, make sure that it allows for some air movement through the pile; a key to decomposition & compost creation.  If your main reason for containment is controlling the abundance in your pile, then a 3-sided structure 3-4 ft cube from landscaping timbers/blocks or encircling the pile with some sturdy wire/fencing (a 9ft length will make a 3ft diameter pile) would be sufficient.  If you are concerned about critters then you may want to consider purchasing a commercially made 'composter' that secures to the ground and has a locking lid.  These composters are also somewhat less "unsightly" if that is a concern for you.  I was able to purchase an Earth Machine composter from the city a few years ago.  I would definetely contact your local waste management offices to see if they offer a deal on a composter as well!

 For more information on building a compost structure see:
NDSU Extension Bulletin H885: Composting Practices

Next week I'll share with you what you can put into your compost pile.  I think you will be surprise at what you can put into your pile. :)

Happy Composting & Gardening! :)

All Posts in the Composting 101 Series:
-Introduction
-Check Local Waste Management
-The 'Pile'
-My 'Piles'
-Compostable Material
-Maintenance

Dandelions Everywhere!

Common Dandelion ( Taraxacum officinale)

As a result of focus elsewhere & neglect of a few, the few have turned into many... many dandelions!  We were so focused on other things the first couple of years in our home and didn't deal with the dandelions that invaded our lawn.  Unfortunately after a couple of years, we were overrun & it has been impossible to get rid of them since.  I'm sad to say that my lawn ranks up with some of the worst in the neighborhood and although my kids hate it every time I pull up one of their 'pretty flowers', my neighbors & I are not so excited about my yellow dotted lawn.

My yellow dotted front lawn.

Having young children, I have focused on trying to eliminate these weeds without chemicals, but am starting to feel like we will need to bring in lawn professionals to spray the yard and start fresh.  This makes me so sad because that means I won't be able to use lawn clippings as mulch in my garden or put it into my compost bin for a month or more, and even more troubling to me is that my kids spend a lot of time playing in the yard and will be exposed to all of that chemical!!! :(

Today I came across an article from the NDSU Extension that addressed ridding your yard of dandelions.  Basically it said there are two options:  pull them out or spray them with herbicide.  I have spent several years pulling dandelions and am loosing the battle! (or maybe I should say I have LOST the battle!!!)

This is where you come in.  Do you have any homegrown methods of weed removal that you have found to be successful?  Please share!!!  According to that same article, I have 10 days or less until my dandelions go to seed.   I would be very grateful (and so would my neighbors!!!) of any help you can give me!

Other posts in this series can be found here:

Dandelions Everywhere!

Dandelions Everywhere and I'm Experimenting...

Dandelions Everywhere: Experiment's Tentative Results

Dandelions Everywhere: The Experiment One Year Later

Planting? to Planted.

   Update:  The weather has been sunny & beautiful yesterday & today, so I headed out this morning with my kidos, had some 'garden education' and planted their Zinnias!  We learned that before you put the plants you want in the garden that you need to remove the plants you don't want (aka weeds!).  Why, I was asked... because the weeds will take some of the food and water our flowers need to grow and we don't want that!  :)  I love sharing my love for gardening & plants with them!  :D

I also got to plant my morning glories I couldn't plant on Saturday and then moved on to do some other outside work.  By about 4pm I was hot and exhausted so we moved inside for some rest time.  Not long after, some great friends showed up.  The perfect end to a really enjoyable day!

I hope you had a good day too!  Doesn't it feel good to get some soil under your fingernails again! ;P  Happy Gardening! :)


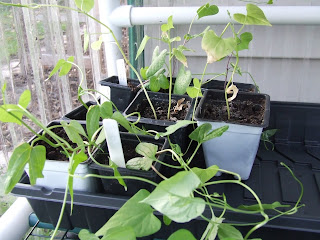
Are you planting this weekend?  In February, I started a variety of flowers and the morning glories are starting to wind their way around the green house.  My average last date of spring frost was May 12 and I had planned on planting the morning glories around my arbor today, but it is raining! :(  Unfortunately that puts the skids on my plans.  How about you? 

Here's to hoping the rain goes away & the sun comes out for a couple of weeks!

Happy wet Gardening! :}

Free Compost & Wood Chips May 11 - June 2

Fargo residents can get up to one yard each of compost and wood chips FREE starting May 11 at the Waste Management compost site near 45th St in north Fargo.  Both will be available every Wednesday & Thursday from 3:30 - 5pm through June 2.

See my thoughts on free compost in the Composting 101 series for things to think about before using someone else's compost.

Happy Gardening! :)

Don't forget National Public Gardens Day: May 6

Don't forget to check out the participating gardens .  It is an awesome opportunity to get spend some time planning & dreaming at a nearby public garden for free!

Happy Gardening! :)