Questions? Write Me at

Questions? Write me at fullcirclegardener @ cableone . net.

Plant of the Week: Kale

Kale (Brassica oleracea) photo credit
Kale is a member of the cabbage or mustard family (Brassicaceae) like broccoli, cabbage, cauliflower, collard greens & brussel sprouts.  This family is commonly called the 'coles' by many gardeners (as in 'cole'slaw).  Amazingly all of these plants were derived from a species of wild cabbage.  Kale & collards are the most similar and thought to be the closest to the wild cabbage of all the domesticated varieties.

photo credit
Kale is grown both as an ornamental and as a vegetable.  It comes in shades of reds and greens and 'white'.  Many of the ornamental varieties combine the colors in one plant giving it a bi-or even tri- colored effect that is very eye catching.  Most ornamental varieties do not have very good flavor, but other varieties are grown for their culinary and nutritive value.  In fact, when it comes to nutrition, kale is a "powerhouse"!  It is packed with many of the basic vitamins and mineral required for a balanced diet.

Both ornamental and culinary kale are very cold tolerant and can be planted a couple of weeks before the last average spring frost and maintained late into the fall or early winter.  In fact, the National Gardening Association says "a few frosts will even improve (the) flavor" of culinary kale.  This tolerance provides for early and late season color in flower beds and garden produce in the kitchen and on the table.

Kale can be started indoors 6-8 weeks prior to the average last spring frost or directly seeded into the garden once the soil is warm.  Plant in a full to partly sunny location giving each plant 12-18 inches of space.  Mulch around the plant to maintain soil moisture.  Be sure the plants are watered with an equivalent to 1 inch of rain per week along with the rest of the garden.  Harvest individual leaves as soon as they are big enough to eat.  Keep in mind that the leaves will be the most tender in the spring and fall since the summer heat tends to toughen the leaves.

Happy Gardening! :)

On The Menu This Week (5-27 to 6-2)

For the last several years I have challenged myself to focus on using from my pantry and shop less for a couple months each winter... a Pantry Challenge.  With the end of February, this year's pantry challenge is complete but I have really enjoyed having a basic menu plan to guide me.  This year I decided to continue to make a month long menu, and be intentional about using garden produce and preserves from last season.

If you are interested in joining my intentional menu planning, check out my Pantry Challenge post to get an idea of how to get started.

Another month draws to a close this week so it is time to make another month long menu.  I am now on my sixth consecutive month of making a menu and I'm loving it!  I am also finding that it only takes me 15-20 min to put together a new menu for the month unless I get stuck thinking of something new to add.  Be encouraged if you are new to menu planning that it does get quicker and easier with time. :)

Here is what is on our menu this week...

Meals:
Sloppy Joe (homemade tomato sauce) & watermellon
grilled salmon & grilled beef kabobs & veggies
ham & scalloped potatoes

Snack:
Oatmeal Pumpkin or Squash Cookies - kids have been begging for these
Rhubarb Bread
fresh fruit & veggies


Happy Garden Eating! :)

Plant of the Week: Cucumber

Cucumber (Cucumis sativus)
Cucumbers join squash and melons in the Gourd family (Cucurbitaceae). Traditionally they have long vines that require an abundance of space, but recent bush varieties, and trellising has brought them into the realm of small space gardening.  Cucumbers come in three general varieties; slicing, pickling and burpless (seedless).  Most produce an elongated fruit though there are varieties that look like small, round, yellow melons.

Plant cucumbers in the spring after all chance of frost has past since the tender vines will not tolerate frost.  Typically cucumbers are planted in hills of 3-4 seeds about a half inch deep and space about 2 ft apart.  The soil should be warm for the best seed germination.  Cucumber plants need consistent moisture throughout out their life to produce healthy, highly productive plants.   For the best chance of maintaining adequate moisture incorporate compost or well rotted manure into the soil before planting and mulch around individual plants to hold the moisture in.  Cucumber fruit are harvested at any size but before the fruit turns yellow.  Remove any fruit that is beginning to yellow to keep the plant producing.

Happy Gardening! :)

On the Menu This Week (5-20 to 5-26)

For the last several years I have challenged myself to focus on using from my pantry and shop less for a couple months each winter... a Pantry Challenge.  With the end of February, this year's pantry challenge is complete but I have really enjoyed having a basic menu plan to guide me.  This year I decided to continue to make a month long menu, and be intentional about using garden produce and preserves from last season.

If you are interested in joining me check out my Pantry Challenge post to get an idea of how to get started.

Here is what is on our menu this week...

Meals:
Spaghetti - home canned spaghetti sauce (leaves just one more quart left)
Sweet & Spicy Glazed Chicken - homemade Peach Zucchini salsa
Grilled Salmon & veggies

Snack:

Rhubarb Strawberry Smoothies -made & froze as popcicles
fresh fruit & veggies

I'm also hoping to bakes some quick breads & muffins for snacks & breakfasts for traveling & camping over the summer.  Do you have any favorite travel or camping foods you would be willing to share?

Happy Garden Eating! :)

Plant of the Week: Strawberries

Garden Strawberries  (Fragaria × ananassa)
There is no strawberry like one that is garden raised, picked at the peak of ripeness, and popped straight into your mouth!  Modern strawberries are a hybrid and have been bred for generations, accounting for the many cultivar found today.  Some cultivars have been bred specifically for supermarkets and produce large. shelf stable fruit while others are bred to be extremely sweet and tender but do not tolerate much handling.

Strawberries come in June-bearing and Ever-bearing varieties.  June-bearing strawberries will produce fruit in June as their name indicates and are then done for the year.  Ever-bearing strawberries on the other hand, start producing in June and will continue to produce a small crop for the rest of the growing season.  Typically June-bearing varieties produce a larger harvest during their short season and are the preference of those who wish to freeze a few, but the ever-bearing will keep your table supplied all season long.


Strawberries can be planted in an in-ground bed, a raised bed, or in a container.  Plant strawberries in the spring once the chance of frost has past, in a bed or container prepared with a soil rich in organic matter and nutrients.  Most strawberries are purchase as started plants and can be found at garden centers or from mail order catalogs.  Just be sure to select a variety that is appropriate to your hardiness zone.  Plants should be spaced 15-24 inches apart in rows that are 12 inches apart to allow the plants to produce runners with daughter plants.  (Do not forget to provide yourself with a 2-3 ft wide path if your bed is more than four feet wide.)  Set each plant just deep enough so that the roots are all in the ground but the crown is not buried.  Water plants well and remove all flowers until the end of July to allow the plants to get established.  This will mean that June bearing plants will not produce fruit the first year.

Protect fruit from nature's thieves (birds, squirrels, etc) by covering them with netting as soon as plants start to turn pink.  Be sure to secure the net well as the wild creatures know as well as you do that this plant has a tasty fruit!  I have watched robins cruise the edge of bird netting looking for any gap in the defenses.  Protect the plants from the winter cold by covering the plants with a thick mulch of straw in the late fall.  Slowly remove the layer of mulch as temperatures rise in the spring but save the straw for mulching between the rows.  This inter-space mulching will help keep dirt and soil microbes that may cause rotting off the fruit as well as help retain soil moisture for the plants.

For more about strawberries, see also my post on Tip Junkie last summer, or how we made our raised bed this spring.  I hope you get a chance to enjoy a few garden fresh strawberries from your backyard this summer.

Happy Gardening! :)

On The Menu This Week (5-14 to 5-21)

For the last several years I have challenged myself to focus on using from my pantry and shop less for a couple months each winter... a Pantry Challenge.  With the end of February, this year's pantry challenge is complete but I have really enjoyed having a basic menu plan to guide me.  This year I decided to continue to make a month long menu, and be intentional about using garden produce and preserves from last season.

If you are interested in joining me check out my Pantry Challenge post to get an idea of how to get started.

Here is what is on our menu this week...

Meals:
Sloppy Joes (BBQ, Chili Burger depending on what your family calls it!) - homemade tomato sauce
Italian Shells - can use fresh spinach when up & will have to use frozen this week
Beef & Veggie Shish Kabobs - can't wait for our garden fresh tomatoes, peppers & eggplant to be available later this summer!


Snack:

Rhubarb Strawberry Smoothies - made this last week & froze as popsicle

Since it is rhubarb season right now, I'd love to hear your favorite way to use rhubarb! :)  I'd love some inspiration. ;)


Dandelions Everywhere: The Experiment One Year Later

A year ago I told you that I have dandelions everywhere in my yard and I was looking for a non-chemical control method that would be family friendly in hopes of ending the invasion.  I ended up setting up an experiment in my back lawn to try one common (pulling) and one not-so-common (boiling water) weed control method.  See my post here for all the details.


The above photo is from the location of my experiment.  There is no visual difference between this spring and last spring. :(  When it was all said and done, not one of the four treatments were effective in killing the treated dandelions over the long term (except for the dandelions that I was able to pull out the entire root.)  In all I would say, try something else. :{  Now I'm off to see what I can try this year. :}  


Happy Gardening (not so Happy Weed Pulling)!


Other posts in this series can be found here:

Dandelions Everywhere!

Dandelions Everywhere and I'm Experimenting...

Dandelions Everywhere: Experiment's Tentative Results

Dandelions Everywhere: The Experiment One Year Later

FREE Local Compost & Woodchips


Fargo residents can get up to one yard each of compost and wood chips FREE starting Sat, May 12 at the Waste Management compost site near 45th St in north Fargo.  Both will also be available every Wednesday & Thursday from 3:30 - 5pm (May 16 through June 7).


According to the City of Moorhead website, 'Finished compost and wood chips for mulch are available to all Clay county residents.'  The Moorhead Compost Facility (Highway 75 N) is north of 15th Ave North with Monday - Friday (8 a.m. to 4:15 p.m.) and Saturday (8 - 11:45 a.m.) hours through October.


If you are aware of any other free compost or woodchip events or sites, please let me know and I will share it with everyone.

Happy Gardening! :)

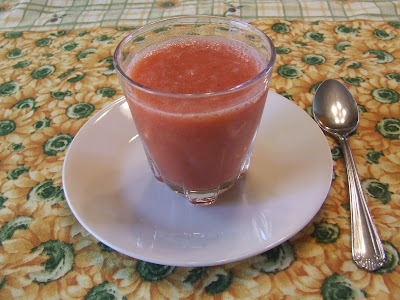
Rhubarb Strawberry Smoothie

I picked the season's first rhubarb last night.  We have been enjoying fruit smoothies recently and I decided it was time to see how rhubarb would work in a smoothie.  I gave it a whirl today and thought I would share our yummy 'concoction' with you.  :)


Rhubarb Strawberry Fruit Smoothie

2 c cleaned and chopped rhubarb
1/2 c water
1 carton strawberries (cleaned with leaves & stems removed)
1/4 - 1/3 c sugar
2-4 c ice (depending on desired consistency)

Bring water to  boiling in a medium saucepan and then add the rhubarb.  Boil for 5 min and remove from heat.  Allow it to cool completely.

Pour the cooked rhubarb and liquid, strawberries and sugar into a blender and puree the fruit.  Add the ice and puree until smooth.

Serve or freeze in popsicle molds immediately.  Enjoy!

Happy Backyard Eating! :D

On The Menu This Week (5-6 to 5-12)

For the last several years I have challenged myself to focus on using from my pantry and shop less for a couple months each winter... a Pantry Challenge.  With the end of February, this year's pantry challenge is complete but I have really enjoyed having a basic menu plan to guide me.  This year I decided to continue to make a month long menu, and be intentional about using garden produce and preserves from last season.

If you are interested in joining me check out my Pantry Challenge post to get an idea of how to get started.  Here is what is what I came up with for this week...

Meals:
Smoked Beef Brisket & veggies
Dill Soup - a family recipe of my husbands'. It's somewhat like a potato soup.  I'll have to purchase potatoes from the store since I'm out of garden potatoes.
Baked Turkey & Sweet Potato Apple Bake

Snack:
Rhubarb bread - Fresh picked rhubarb
Rhubarb Strawberry Smoothies - fresh picked rhubarb & store strawberries

Since it is rhubarb season right now, I'd love to hear your favorite way to use rhubarb! :)  I'd love some inspiration. ;)


Happy Garden Eating! :)

Creating a New Strawberry Bed

 Old (sad) Strawberry Bed and New Strawberry Bed         

Moving our strawberries to a new location has been on my agenda for several years and this spring it has finally happened.  My inspiration/motivating factor was the redwood decking that we salvaged when we replaced our deck last summer.  I am dreaming of several garden 'tools' that I can make with this wood, but the strawberry bed is the first to reach fruition. :)  (I am hoping to get a couple of cold frames made this summer as well, so be watching for that.)

Last fall we sorted through the salvaged wood and pieced together the structure.
The structure of the bed (upside down until soil was added so kids didn't use it as a balance beam).
We cut four 7.5 ft lengths of 2x6 for the bottom tier, 5 ft lengths of 2x4 for the second, and 2.6 ft lengths of 2x4 for the third.  We chose to use 2x6s on the bottom tier and 2x4s for the top two tiers to give the bottom tier a little extra rooting depth before reaching our predominately clay soil.  The top two layers would have each of the layers below it to in addition to it's own so 2x4s should be adequate. The corner supports were cut from 4x4's.  The length of each layer's corner support was the width of it's sidewall plus the sidewalls below it (bottom: 6 inches, middle: 4+6 inches, top: 4+4+6 inches).  Each layer was assembled using 3 inch wood screws to secure the sidewalls to the 4x4 supports.

Once we had determined the location for the new bed, I laid down the bottom tier and covered the existing grass with a layer of cardboard and newspaper.
This layer of dense paper material will breakdown and become compost with time, but will prevent the grass from growing up through the new soil and invading my new bed right away.  Landscaping fabric would work as well, but I wanted to allow for the strawberry roots to penetrate down into the existing topsoil as well so I opted for the layer of cardboard/paper mulch.

Next we determined the alignment of the tiers and then added soil. 
Over the last 7 years I have been working large amounts of organic material into my veggie garden soil.  In the process is has become a raised bed and so I chose to pull soil from my garden to fill the strawberry bed.  My husband tilled a trailer load of aged goat manure & straw bedding, all of the compost we had generated from yard and household plant material over the last year, and some high nitrogen fertilizer (to compensate for the under composted bedding straw) into my garden.  The kids and I then transferred soil into the new strawberry bed (hubby had to go back to work :}).  Great 'physical education' for all of us! ;)

Once the soil is in place, it is time to plant. 
When establishing a new strawberry bed, it is important to start with young, healthy plants.  Either plan ahead and root runners from an existing bed into pots, or purchase plants from a garden center or garden mail order catalog.  If purchasing plants, be sure to select a variety that will be hardy in your zone.  If you question what varieties are good for your area, it is always a good idea to contact your local county extension agent or master gardener.  Plant strawberries so that the roots are entirely covered but the crown in not buried.  It is important to remove all flowers from June-bearing strawberries and from ever-bearing strawberries until the end of July.  This is done to give the plant sufficient time to establish itself before trying to produce fruit.  Be sure to water the strawberries well while they getting established.

Good Luck & Happy Gardening! :)


Rhubarb, One of Spring's First Fruits

New flower stalk (left) and new leaf bud (right).

I was out enjoying my yard last week and realized that my rhubarb is already starting to send up flower stalks!  Yikes, already!  Here is a friendly reminder to remove all flower stalks from your rhubarb throughout the growing season.  The 'fruit' portion of rhubarb is the petiole, or the stalk, of the leaf.  Flowers suck energy from the stores in the root which is where the energy comes to produce the 'fruit' leaves in the spring. 

I also realized that my rhubarb is ready to harvest.  (Is it really just the first of May?!?!)  When harvesting rhubarb, grab the leaf stalk close to the soil and pull up the whole petiole (stalk) and leaf.  Remove the leave portion and add it to your compost pile. You can remove up to about half of the leaf area from one plant at a time, but be sure to let the plant restore itself before you harvest again.  You can continue to harvest until the end of June and then you will need to leave it alone so the plant can spend the rest of the summer storing energy in its roots for next spring.

For more information on rhubarb here or in my Plant of the Week series.

Happy Gardening & Harvesting! :)

2nd Annual HSV Garden Challenge: Linkup #2


It is time for the second linkup for the HSV Garden Challenge.  This last month has been loaded with Garden learning both in both the indoor and outdoor classrooms.  Yeah for spring and spending more time in the outdoor classroom! :D

We had only two letters of the alphabet, Q & Y, left to study when the garden challenge started.  Even with these two 'crazy' letters, I tried to incorporate some 'garden' learning into our lessons.  On Q week we studied birds (Q = quail) and the roll plants play in bird's lives as food and shelter, and on Y week we studied colors (Y=yellow).  The highlight of Y week was watching a celery stem draw colored water up the stem.  It is such a great illustration for young minds to grasp how water moves through a plant up toward the leaves (transpiration).

We recorded observations on our bean experiment every day for 21 days and then transplanted #1 (control) and #2 (no sunlight) into soil and placed them in the greenhouse with all my started garden plants.  This week we noticed that #1 has started setting buds and will flower soon.  It is our goal to plant both #1 & #2 into the garden and continue to follow them for the rest of the summer.

Having completed our curriculum, we are currently doing Garden Challenge inspired unit studies each week.  :)  One week we focused solely on plants, another week we studied weather and seasons and we are currently studying insects.


The weather and seasons study was especially fun.  Our studies were centered around the book, 'Bear's Busy Year' and 'Zinnia's Flower Garden'.  Every day we observed and recorded the current weather conditions and spent one day focused on each of the four seasons.  We investigated and thought about what plants are doing and what we are doing during each season and then created a book illustrating what is happening in each season.

We are following a similar pattern as we study insects and are having a great time observing the many pollinators that have been visiting our Nanking and Evans cherry trees over the last few weeks.  The kids were given a Lady Bug Land kit for Christmas.  The Ladybugs arrived the first week of April and over this last week all of the Ladybugs emerged from their pupa!  It has been fascinating for all of us to watch them transform from pinhead sized larva into pupa and now Ladybugs.  We plan to release them into our backyard on Friday so they can protect our garden from insect 'pests' (aphids) this summer. :)

Last, but not least, we had garden 'physical education' last weekend as the kids helped me move soil into our new strawberry bed .  They were very excited to help dig and transfer soil into the new bed (top photo).  It is great to have a willing and truly helpful helper for this somewhat laborious task.  It didn't hurt to know that the end result would be an abundance strawberries available for the picking! ;)  No matter the motivation, I was happy to have the help and happy to watch my child share in the excitement of an anticipated harvest.

I hope you have a chance to share some garden learning and harvest anticipation moments with your kids this month. :)

Happy Gardening (and Garden Learning)! :)

The next linkup will start on May 31st.